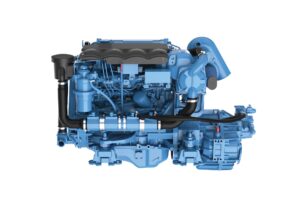
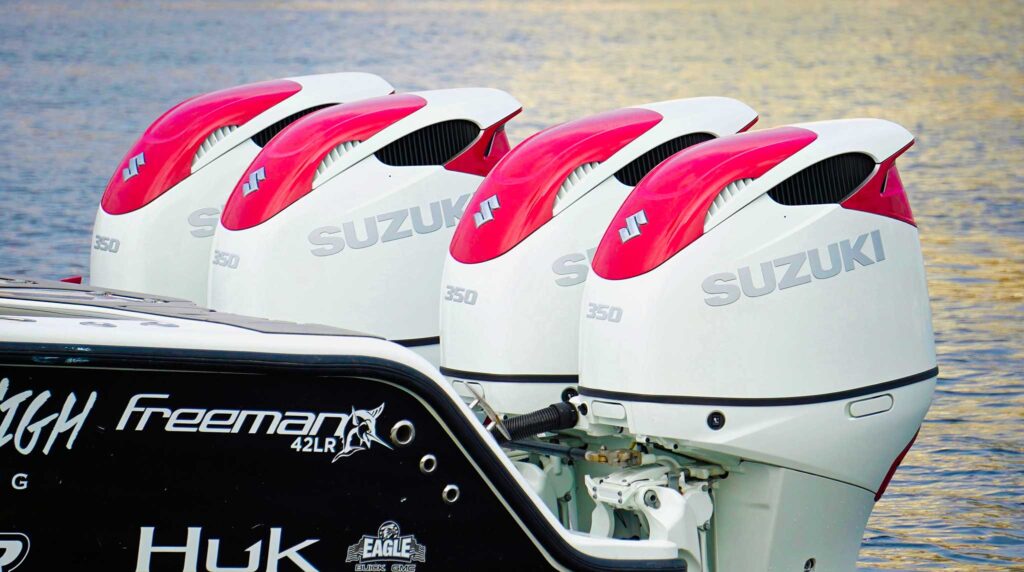
Most engines are white. To get anything else, motors must take a trip to the spray booth. Jeanne Craig
Some folks are monochromatic. They dress in all black or brown (it’s the new black) or maybe camo. They buy custom wheels the same color as their car. If they could paint the tires, they would. When these people buy boats, they want their outboards the same color as the hull, which usually means a custom paint job. Even though engine builders are branching out with color choices, most engines are a shade of white, with some manufacturers still offering classic blue-gray or black. Anything else means a trip to the spray booth. That journey can take you deep into four-figure territory.
Some manufacturers will paint the motors as a factory option. Fountain, for example, offers Mercury outboards in Pro Black (the longtime standard Mercury color) or Fusion White (about $3,300 extra), or painted in one of 19 custom colors (about $7,000 per engine for most, more for a few super-cool colors). A Mohawk stripe—a streak of color on the cowl—adds around $1,700. Mercury sells polycarbonate “accent panels” for some motors that peel-and-stick onto the cowl; they come in a few colors, or can be primed for painting them yourself. The cost varies from a few hundred bucks to more than $1,000.
On the other hand, Grady-White delivers boats with Yamaha outboards in a classic white developed specifically for the builder. Thus, a custom paint job is up to the dealer or the customer. Cost? Depends on the motor and who’s painting it.
There’s also the option of custom canvas covers for your outboards in an appropriate hue, or you can have them vinyl wrapped. That’s less costly than painting, and easy to reverse when it’s time to sell. But if you’re dead set on paint, keep reading.
These prices for custom paint may sound steep to some boat owners, but Jim Teixeira said they’re not too far out of line. Teixeira is a service manager at Kingman Yacht Center in Cataumet, Massachusetts, a full-service yard and new-boat dealer for Cobia and Fountain. He has been painting boats and motors for more than 45 years.
There are a lot of hours of labor in a good paint job, and that costs money, he said. (Kingman charges $130 per hour for painters, more for mechanics.) While some yards, and most do-it-yourselfers, paint the motors on the boat, Teixeira removes the motors and paints them in the spray booth, where it’s easier to control the environment. Even a whisp of dust or an errant bug landing on wet paint will ruin the job.
Since motors are heavy—a V-6 Yamaha weighs more than 550 pounds—they need a forklift and operator to move them inside. But painting the motors on the boat means extensive masking to keep the overspray under control, and that also takes time and adds cost.
New motors are easy to paint, Teixeira said. Most of them don’t even need primer, since they’re painted at the factory. “But you need a primer over gelcoat,” he said, “and older motors often need filling and sanding.”
The cowl in particular cannot have any dings, scratches, abrasion or other damage. The manufacturer’s decals have to be peeled off, and the residual adhesive removed with solvent. Teixeira pulls the prop and removes the cowl, any plastic parts and the “chaps,” which are the side panels that, on newer outboards, cover the midsection. Some people call them “skirts.” These parts, he preps and paints on the bench.
The cowl and chaps cover enough of many outboards that painting them, and leaving the rest of the motor alone, will satisfy most customers’ sensibilities. Taking that route is a lot easier and cheaper than painting the whole motor. Teixeira paints with Awlgrip products if the customer wants a certain color, or sometimes automotive paints. “Cars stay shiny for years,” he said.
Old-timers say that 95 percent of a paint job is in the preparation. First, the motor must be scrubbed to remove grease, dirt and wax. Teixeira uses a Scotch-Brite pad and Comet. That’s followed by sanding until the surface is uniformly dull. An outboard motor has lots of angles, nooks and crannies, so sanding takes time. Then there’s another cleaning with water and solvent.
When the surface is as smooth as glass, it’s wiped down with a tack rag to get the final dust motes off before spraying on the primer. Some primers can be overcoated without more sanding if it’s done within the “recoat window,” typically 24 hours. Otherwise it’s more sanding with a Scotch-Brite pad or wet-and-dry sandpaper before shooting the color. A clear coat follows the color coat, to add shine and enhance durability, again within the recoat window. Clear coats typically need a week to fully cure.
What About DIY?
Teixeira said boat owners with a building to work in can paint their own motors. Hang lots of plastic to contain the overspray, and circulate plenty of fresh air. Cover intake and exhaust fans with filters to keep dust from coming in and overspray from getting out. Dust will also accumulate on the fan blades and generally gum things up.
Wear a respirator, not just a dust mask. Paint, especially two-part paint, is toxic. If you’re painting the motors on the boat, mask thoroughly so the overspray doesn’t go all over the transom and aft deck.
Before painting, Teixeira wets down the shop floor to keep the dust down. You’ll get a better outcome with an air compressor and spray gun than with aerosol cans, he said, but if you use “spray bombs” (aerosols), those with two-part paints will turn out a good job if you do the proper preparation. Most people just pick up the spray can and start shooting, Teixeira added. That’s not the way to get a professional finish. “Never blame the spray gun for a bad job,” he said. “You did the prep.” Whatever paint system you use, follow the directions exactly.
One two-part aerosol paint that gets good reviews is Quantum99 2K, an acrylic-polyester hybrid from Engineered Marine Coatings in Huger, South Carolina. “It’s like a combination of Awlgrip and Awlcraft on steroids,” said company founder Jon Boswell. It’s strong and repairable, and has enough gloss and color retention that it doesn’t need clear-coating, he said.
Boswell sells an aerosol Topcoat Kit with coverage for a typical 175-hp outboard. It includes a cleaner, a can of adhesion promoter (more about this below), two cans of primer/sealer, two cans of topcoat color, and assorted scour pads, tape, masking materials and gloves. It comes in 22 colors and costs $368.
If you need more paint, single cans cost $82 for color, and $68 for primer. Quantum 99 is also available by the quart or gallon. Call before ordering, and Boswell will help you determine what you need, as well as your estimated cost. “The going rate around here is about $3,000 to paint a 150-hp outboard at the yard,” Boswell said.
About that Topcoat Kit’s adhesion promoter: The chaps and cowls on modern outboards are often made of injection-molded, glass-reinforced plastic. They’re not fiberglass like the cowls on older motors. Today’s cowls are usually painted, and can be treated like glass, but not the chaps, nor the smaller plastic parts such as grills in air vents on the cowl. Unpainted plastic should be sprayed with an adhesion promoter before priming and painting.
You don’t always have to sand first; adhesion promoter will stick to most plastics without sanding. But not all of them. Mercury, for example, injection-molds its chaps from DuPont Surlyn Reflection, a high-performance thermoplastic alloy. The color is built into the plastic, which is formulated to have a high gloss without painting.
The bottom line is, check your owner’s manual or with your outboard’s manufacturer before DIY painting your motor. Or, save some cash and just paint the cowl, which usually takes the worst beating from the sun. —Mike Smith
January 2026